
As Swift developers, we often face the challenge of managing dependencies in our applications. Proper dependency management is crucial for writing maintainable, testable, scalable code. Having a lightweight dependency injection container would help manage dependencies in your Swift applications.
- Introduction
- What is Dependency Injection?
- Why Use a Dependency Injection Container?
- A Lightweight DI Container
- Features
- Implementation
- Sample App Overview
- Step 1: Define the Dependencies
- Step 2: Define the View Models
- Step 3: Setup the Dependency Container
- Step 4: Create the SwiftUI Views
- Step 5: Setup the App Entry Point
- Step 6: Enable SwiftUI Previews
- Conclusion
Introduction
This is where Dependency Injection (DI) comes into play. I’ll introduce a lightweight Dependency Injection Container for Swift designed to simplify dependency management. We’ll walk through the benefits of using this tool and demonstrate its use with a sample SwiftUI app.
What is Dependency Injection?
Dependency Injection is a design pattern that helps decouple object creation from usage. Instead of creating their dependencies, objects receive them from an external source, often called a container. This pattern promotes better code organization, easier testing, and improved maintainability.
Why Use a Dependency Injection Container?
Using a DI container in Swift applications offers several benefits:
- Decoupling: Separates the creation of objects from their dependencies, making the code more modular and flexible.
- Testability: Makes it easier to inject mock dependencies for testing purposes.
- Maintainability: Centralizes the configuration of dependencies, simplifying updates and changes.
- Scalability: Helps manage dependencies in larger applications with complex object graphs.
A Lightweight DI Container
I’ll present a lightweight Dependency Injection Container for Swift. It is designed to be easy to use and integrate into any Swift application. It provides a simple API for registering and resolving dependencies.
Features
- Register Dependencies: Easily register factories and singletons.
- Resolve Dependencies: Resolve registered dependencies with type safety.
- SwiftUI Integration: Seamlessly inject dependencies into SwiftUI views.
Implementation
Let’s dive into implementing a DI container and how to use it in a sample SwiftUI app.
Sample App Overview
The sample SwiftUI app I’ll discuss demonstrates how to use the lightweight Dependency Injection Container to manage dependencies. The app has two main components: a message display and a counter.
The MessageViewModel fetches a message from a MessageProvider, and the CounterViewModel manages a counter using a Counter class. These dependencies are registered in the SimpleDependencyContainer and injected into the SwiftUI view via the environment.
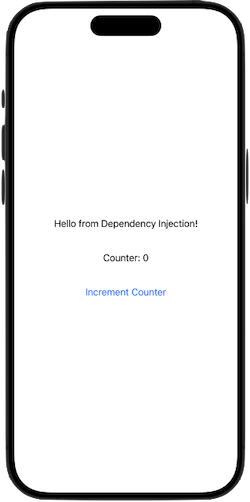
The app displays a message, shows the current counter value, and provides a button to increment the counter. It showcases how dependencies can be managed and injected seamlessly into the SwiftUI views using the DI container. This setup promotes better code organization, easier testing, and improved maintainability.
We’ll walk through the following six steps to implementing the sample app:
- Defining the Dependencies
- Defining the View Models
- Setting up the Dependency Container
- Creating the SwiftUI Views
- Setting up the App Entry Point
- Enabling SwiftUI Previews
Step 1: Define the Dependencies
First, we’ll define the dependencies we’ll inject into our SwiftUI views.
import SwiftUI

protocol MessageProvider {
    var message: String { get }
}

class SimpleMessageProvider: MessageProvider {
    var message: String {
        return "Hello from Dependency Injection!"
    }
}

class Counter {
    private(set) var value = 0

    func increment() {
        value += 1
    }
}
Step 2: Define the View Models
We’ll define the view models that use the dependencies provided by the container.
class MessageViewModel: ObservableObject {
    @Published var message: String = ""

    init(messageProvider: MessageProvider) {
        self.message = messageProvider.message
    }
}

class CounterViewModel: ObservableObject {
    @Published var count: Int = 0
    private let counter: Counter

    init(counter: Counter) {
        self.counter = counter
    }

    func increment() {
        counter.increment()
        count = counter.value
    }
}
Step 3: Setup the Dependency Container
We’ll set up the dependency container and register the dependencies.
final class SimpleDependencyContainer: DependencyContainer {
    private var factories = [String: () -> Any]()
    private var singletons = [String: Any]()

    func register<T>(type: T.Type, _ factory: @escaping () -> T) {
        let key = String(describing: type)
        factories[key] = factory
    }

    func registerSingleton<T>(type: T.Type, _ factory: @escaping () -> T) {
        let key = String(describing: type)
        singletons[key] = factory()
    }

    func resolve<T>(type: T.Type) -> T? {
        let key = String(describing: type)
        if let singleton = singletons[key] as? T {
            return singleton
        }
        return factories[key]?() as? T
    }

    func setupDependencies() {
        self.register(type: MessageProvider.self) { SimpleMessageProvider() }
        self.registerSingleton(type: Counter.self) { Counter() }
        self.register(type: MessageViewModel.self) {
            MessageViewModel(messageProvider: self.resolve(type: MessageProvider.self)!)
        }
        self.register(type: CounterViewModel.self) {
            CounterViewModel(counter: self.resolve(type: Counter.self)!)
        }
    }
}
Step 4: Create the SwiftUI Views
We’ll create the SwiftUI views that use the view models injected via the environment.
struct ContentView: View {
    @EnvironmentObject var messageViewModel: MessageViewModel
    @EnvironmentObject var counterViewModel: CounterViewModel

    var body: some View {
        VStack {
            Text(messageViewModel.message)
                .padding()

            Text("Counter: \(counterViewModel.count)")
                .padding()

            Button(action: {
                counterViewModel.increment()
            }) {
                Text("Increment Counter")
            }
            .padding()
        }
    }
}
Step 5: Setup the App Entry Point
We’ll set up the dependency container and inject the dependencies in the App struct.
@main
struct DependencyInjectionApp: App {
    let container = SimpleDependencyContainer()

    init() {
        container.setupDependencies()
    }

    var body: some Scene {
        WindowGroup {
            ContentView()
                .environmentObject(container.resolve(type: MessageViewModel.self)!)
                .environmentObject(container.resolve(type: CounterViewModel.self)!)
        }
    }
}
Step 6: Enable SwiftUI Previews
We can enable SwiftUI previews by setting up the container in the preview provider.
struct ContentView_Previews: PreviewProvider {
    static var previews: some View {
        let container = SimpleDependencyContainer()
        container.setupDependencies()

        return ContentView()
            .environmentObject(container.resolve(type: MessageViewModel.self)!)
            .environmentObject(container.resolve(type: CounterViewModel.self)!)
    }
}
Conclusion
We just walked through an introduction of a lightweight Dependency Injection Container for Swift and demonstrated how to use it in a SwiftUI application. This container simplifies dependency management, enhances testability, and promotes maintainable and scalable code by decoupling dependency creation from usage.
This DI container can be easily integrated into any Swift application, effectively providing a powerful tool for managing dependencies. Try it out in your projects and experience the benefits of streamlined dependency management in Swift!
Find the source at my github: https://github.com/duliodenis/swift-dependency-injection-container
Stay Swifty!
