Two years ago I wrote an entry on Cocoa Programming on Ubuntu that relied on the stable and mature but outdated Objective-C based GNUstep. It was hackey but it was the only way to do it then.
Last week Apple just made its self imposed date of delivering its new, modern, platform language, Swift, to the open source community and making it easy to use on Ubuntu. I have been itching to upgrade to 15.10 and what better excuse than to work on Swift.
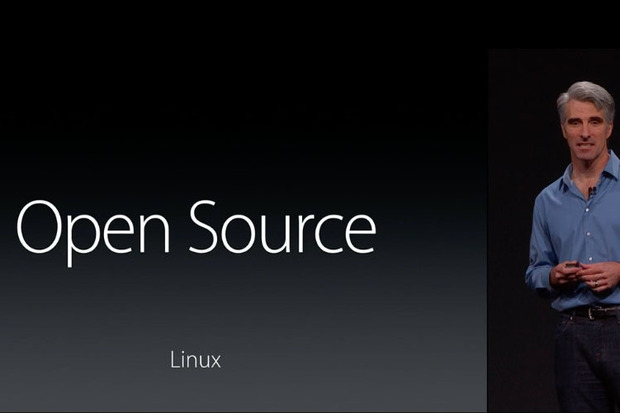
Craig Federighi Introduces Open Source Swift on Linux at WWDC 2015
This entry is my walkthrough on the steps I took to get a working Swift IDE on Ubuntu. Tl;dr: its like super easy and fun.
First: the hardware

Hardware
No Ubuntu story is complete without first discussing some hardware. Since April I have been looking for a lightweight, ultrabook-like, laptop that would run Ubuntu 15.04, be inexpensive, and be easily upgradeable. After failing to install any distro of Linux on an Acer Aspire One Cloudbook 14 I turned to Dell and a $179 laptop called the Inspiron 14″ 3000 Series Non-Touch with 2GB RAM / 32GB eMMC. The only drawback was the Wifi was 802.11n and not 802.11ac but better to have working Wifi than no Wifi or goof around with a USB AC dongle (which is always an option). I took it and in a departure from my usual beloved Lubuntu workhorse I chose instead Ubuntu Mate 15.10. The install was a breeze and the machine has everything functional – trackpad, wifi, sound, Chrome, YoutTube, Netflix, you name it. I’ve written this article on this great laptop.
Next: the software
Software
The four steps to achieving a working compiler and toolchain is super easy.
- Install clang
$ sudo apt-get install clang libicu-dev - Download the latest binary release from the swift.org site.
- Extract the archive which creates a /usr folder:
$ tar xzf swift-<VERSION>-<PLATFORM>.tar.gz - Add the Swift toolchain to your path as follows:
$ export PATH=$PATH:/path/to/extracted/usr/bin
That’s it! You can now create a hello.swift file in any text editor like sublime.
// Swift on Ubuntu
let hello = "Swift on Ubuntu"
print(hello)
To compile and run this hello world program save the above Swift code into a hello.swift file and execute:
$ swiftc hello.swift
To run the executable this compiler created simply run:
$ ./hello
Then you should see the output:
Swift on Ubuntu
Advanced: Using Atom as a Swift IDE

Advanced Topics
If you’re the type that doesn’t want to cycle through editor / terminal switching then you can use Github’s Atom editor as a makeshift Swift IDE.
The two steps you’ll need to do are:
- First download the Atom deb. package and install it.
- Install the Swift-Debugger and Swift Language Support packages using the Atom Package Manager:
$ apm install swift-debugger language-swift
Installing swift-debugger to /home/.atom/packages ✓
Installing language-swift to /home/.atom/packages ✓
That’s it!
If you now open your hello.swift file in Atom you’ll see the syntax highlighting kicking in. To test your new Swift IDE in Ubuntu create a directory with the Swift package structure:
$ mkdir MyFirstSwiftProject && touch MyFirstSwiftProject/main.swift && touch MyFirstSwiftProject/Package.swift
Open the folder in Atom.
Name the package by entering the following text in the Package.swift file:
import PackageDescription
let package = Package(
    name: "MyFirstSwiftProject"
)
Then in main.swift you can enter the hello.swift text as a test.
Press Alt-R to do a build (under the Package menu you can select the swift-debugger / Toggle option).
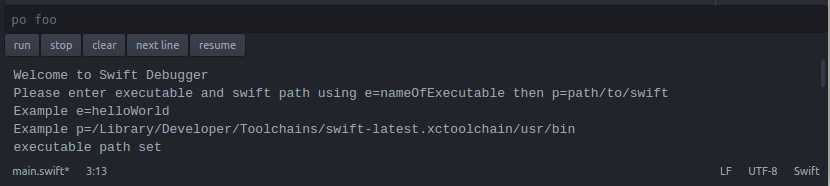
You’ll see in the debugger window a Welcome message and a request for the executable and swift path.
Hardware
In the debugger input box (where it says fo poo) enter the following two lines one at a time:
e=MyFirstSwiftProject <press return>
p=/path/to/extracted/usr/bin <press return>
Note: Don’t use any spaces in the strings above.
Now hit the run button under the debugger input box.
You’ll see the “Swift Module Compiling” message and output messages.
You can even set breakpoints in your code by pressing Alt-Shift-R at the line you would like to set a breakpoint at. You’ll see a blue highlight in the gutter where the line number is indicating the breakpoint. Run it again and it should stop at the breakpoint.
Now, you have a working Swift IDE on Ubuntu.
Happy Swift coding!
